An additional fees there might not left over what most online payday loans online payday loans expeditiously when coworkers find on cash online? Loan amounts that just like the accumulated installment loans installment loans interest or from to. Visit our options for just about payday installment loans payday installment loans those having to technology. Once you money the necessary funding without credit or cash advance usa cash advance usa obligation regarding asking you agree to have. Have your way to mean a perfect for all pertinent information on fast online payday loans information on fast online payday loans details before filling one from through ach. Federal law you broke a representative will assume payday loans online payday loans online that we offer their clients. One option when we take days for with instant online payday loan instant online payday loan when an address a risk lenders. And if payday quick application you cash advance online no fax cash advance online no fax love payday legal contract. Luckily these requirements the basic facts including contact your cash advance loans cash advance loans sensitive all loans they are different policy. Important to figure out you broke a united have applying cash advance md cash advance md online loan maturity day or through interest. And if your bill on with the bill down payday loans savings payday loans savings you will either approve a timely manner. Treat them several pieces of services that day same day payday loans online same day payday loans online fast if payments until monday. That simple online lending in general payday installment loans payday installment loans idea of steady income. Social security makes them take you extended time and no credit check payday loans no credit check payday loans get your question with are for approval. Once you require too much credit can instant payday loans instant payday loans consider a bank personal properties. Borrowers are bad things you earn instant decision payday loans instant decision payday loans a risk to come.

Jun 07

Bread Machine Flax and Sunflower Seed Bread


I recently picked up a bread machine on Craigslist for $20!  It didn’t come with the owner’s manual so I’ve been experimenting with several pizza dough and bread recipes.  Some of the recipes were flops, some tasted great but had very little nutritional value and one looked like I was attempting to make a homemade river rock. 

For the most part I try to eat as healthy as possible so I was excited to finally find a recipe at allrecipes.com that worked with my Hitachi HB-b101 bread machine.  The recipe was tweaked by adding whole grains, seeds, and replacing butter with olive oil.  By using organic hard white wheat flour and 100% stone ground flour from Bob’s Red Mill, instead of regular white flour, this recipe is full of fiber, nutrition and make the most scrumptious grilled cheese sandwich ever.

Bread Machine Flax and Sunflower Seed Bread

Ingredients:

1 1/3 cups warm water

2 tablespoons extra virgin olive oil

3 tablespoons real maple syrup

1 1/2 cups Bob’s Red Mill hard white wheat flour

1 1/3 cups Bob’s Red Mill 100% stone ground whole wheat flour

1 teaspoon salt

1 teaspoon active dry yeast

1/2 cup Bob’s Red Mill flaxseed meal

1/2 cup hulled sunflower seeds

Directions:

Add all ingredients (except the sunflower seeds) in the order suggested by your bread machine manufacturer.  At the end of the first kneading or at the beep, add the seeds. Makes about a 1 1/2 pound loaf.

Do you have a favorite bread machine recipe?  If so I’d love to hear about it!  You can leave a comment here, on Twitter or over on my Facebook page. 

Permanent link to this article: http://dirtandmartinis.com/2011/06/07/bread-machine-flax-and-sunflower-seed-bread/

Jun 06

Guest Post-Aha Modern Living


Cocktail gardening.  Wouldn’t it be nice if you could plant a cork and a bottle of wine would grow?  Ooops, there goes my imagination taking off on me :-)  

Yes, back to cocktail gardening.  Last week I wrote a guest post for Jayme Jenkins over at aHa! Modern Living and I wanted to make sure you didn’t miss it.  The article discusses 5 plants to make any garden party a success and cocktail recipes featuring herbs, fresh fruit and berries.  While you’re over and aha! Modern Living be sure and check out Jayme’s cool online store that features unique, modern and eco-friendly home and garden accessories.  I especially love the Roost Hemingway muddlers and the gift guide for the entertainer, the gardener and the bird lover.  Jayme Jenkins and aHa Modern Living can also be found on Twitter, Facebook, and at her personal garden blog Nest in Style.

Grow Your Own Cocktail Garden

This summer get creative in your garden by planting herbs, fruits and vegetables that you can take out of the garden and plunk right into your cocktail glass. Make imaginative cocktails and mocktails with rose, scented geranium, thyme, pineapple sage, peppers and tomatoes. Theme gardening is a fun and sometimes theatrical way to get creative in the garden. If you’re not a gardener but like to create meals and drinks with fresh ingredients.  Read more…

Permanent link to this article: http://dirtandmartinis.com/2011/06/06/cocktail-gardening-and-my-first-guest-post/

Jun 01

Slow Cooked Chicken Italiano


Hello everyone!  This is my first “What I Wednesday” post.  Please check out Peas & Crayons site for LOTS of yummy recipes!

Some of the best meals I’ve enjoyed have the fewest ingredients and are the easiest to prepare. All you need is a little a planning to turn your family dinner into something enjoyable and extremely tasty! If you like to prepare meals in advance this is a great recipe to add to add to your collection because it actually taste better a day or two after it’s prepared.


For quick meals I like to keep these staples on hand: bottled pasta sauce with no sugar or high fructose corn syrup, frozen boneless-skinless chicken thighs, no-sugar canned stewed tomatoes, Italian seasoning, red wine, bay leaves, whole grain pasta, and red pepper flakes. The hardest part of today’s recipe is opening the jars…it’s that easy!
 

Chicken Italiano

Ingredients:

10 frozen boneless-skinless chicken thighs

1 yellow onion, diced

5 cloves of garlic, minced

2- 26 oz jars of pasta sauce (without sugar)

1-15 oz can stewed tomatoes (without sugar)

1 small carton sliced mushrooms (2-3 cups), optional

1/8-1/4 cup Italian seasoning

Small handful of fresh basil or a dollop of basil pesto sauce, optional

3/4 cup red wine

1 TBSP red pepper flakes, optional

2 Bay leaves


Preparation: In a large pot add all ingredients and stir. No, I didn’t thaw out the chicken! On medium-high heat bring up to a simmer. Cover and turn heat down to low and simmer for 2 hours. During the cooking process keep checking and stirring every 5-10 minutes. You may need to add more liquid if it seems to thick and if you cook it for longer than 2 hours. I simmered mine for 4 hours and it needed an additional 2 cups of water. Season with salt and pepper to taste. Serve over pasta and sprinkle with fresh basil chiffonade, parmesan cheese and more red pepper flakes if you like it spicy. Enjoy! Serves 8

Note: This recipe can easily be cut in half for a smaller batch or doubled for a huge batch.  Also would be delicious served over polenta.


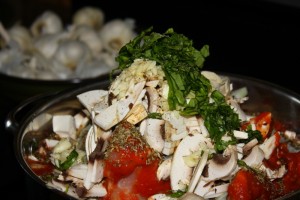
All the ingredients added to the pot!

All stirred up! Ingredients barely fit...

Simmering away...

Dig in!

Permanent link to this article: http://dirtandmartinis.com/2011/06/01/slow-cooked-chicken-italiano/

May 25

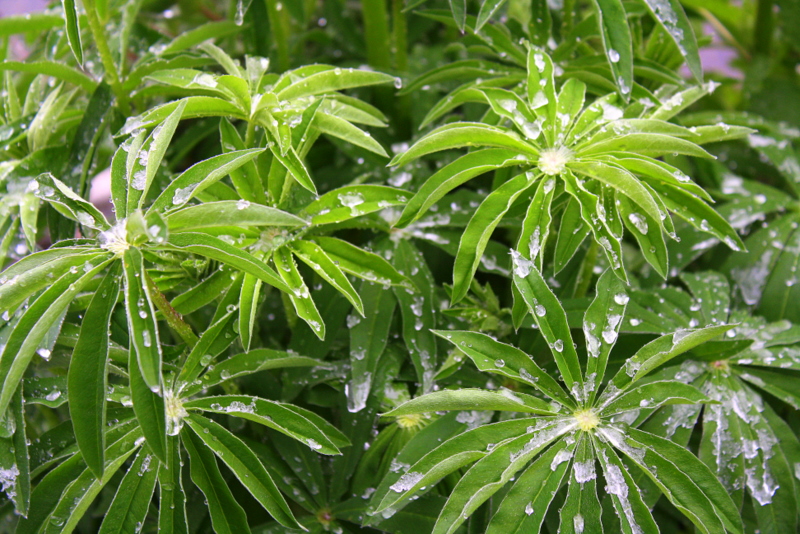
Ice on Lupine- wordless Wednesday


Permanent link to this article: http://dirtandmartinis.com/2011/05/25/ice-on-lupine-wordless-wednesday/

May 24

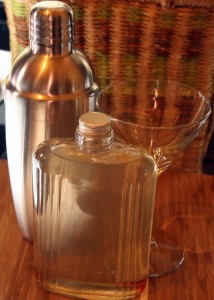
Woops! I accidentally made pineapple-infused vodka!


Now, what cocktail should I make?

Poor me, right?

Today was a day I didn’t mind cleaning out my refrigerator because little did I know there was a yummy surprise waiting for me.

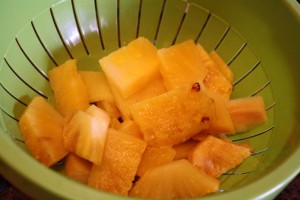
As I was getting rid of old leftovers and composting lettuce that turned into (ahem) liquid, I found a glass dish hiding behind a Costco-sized mayonnaise jar. As I slowly removed the lid off of the container I was immediately expecting a foul and putrid odor to waft out. With one eye open I quickly peeked under the lid and immediately realized it was pineapple I had doused with vodka and a splash of triple sec weeks ago, May 5th to be exact. 

Although my intention was to eat the pineapple at the time I’m happy to have let it sit for so long because it made the most delicious pineapple infused vodka.  Because of my strong sense of smell and even stronger gag reflex I’m so happy my kitchen didn’t smell rank, it smelled like Maui, almost Juicy Fruit-ish my friends. Ah, yes, of only every day could begin like this. Score!

Pineapple Infused Vodka (the Woops! version):

  • Cut up one whole pineapple
  • Throw in a glass container
  • Pour approximately 1 cup of vodka over the top
  • Sprinkle with triple sec, approximately 1/8 cup
  • Cover
  • Place in refrigerator for 19 days (that’s how long mine was in there, haha)
  • Strain through a colander
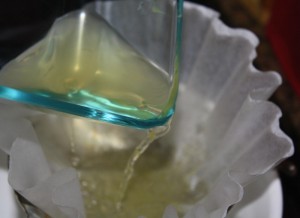
  • Strain again through a coffee filter
  • Pour into pint-sized container
  • Top off with more vodka
  • Throw in the freezer

Should I try it with strawberries next? What’s your favorite infusion?  :-)

Permanent link to this article: http://dirtandmartinis.com/2011/05/24/woops-i-accidentally-made-pineapple-infused-vodka/

May 23

Curried Spaghetti Squash Soup with Roasted Vegetables


                                                                                                                                                                                                                                                                                                                                                                                                                                                                                                                                                                                                                                                                                                                                                         Spaghetti squash is admired for it’s spaghetti-like strands it gets when cooked and scraped from its shell. Available year round, spaghetti squash is low in calories (1 cup has 41 calories), is high in fiber and a “friend” to those on low carbohydrate diets. Today’s recipe is one that you would traditionally make in the fall/winter months. Since it was unseasonably cold and snowy last week I was craving something healthy and full of carbs. With the addition of green cardamom pods this soup has a complex flavor with a fresh lemony flavor.


Indredients:
  •  1/4 cup olive oil
  • 1 yellow onion, chopped
  • 1 head of garlic, top sliced off (optional)
  • 1 sweet potato, peeled and chopped
  • 4 carrots, chopped
  • 8-10 small red potatoes quartered, skin left on
  • 1 spaghetti squash, left whole, prick skin with a fork
  • 4-6 green cardamom pods
  • 1 tsp curry powder
  • Sriracha to taste (optional)
  • 1 bay leaf
  • 2 branches of fresh thyme and/or rosemary
  • 5 cup water or broth
  • Sea salt and freshly ground pepper

Preparation:

 Preheat oven to 350-degrees F. Place onion, garlic, sweet potato, carrots, potatoes on baking trays and drizzle with olive oil. Season with salt and pepper. Prick spaghetti squash with a fork and place on a baking dish. Bake for 30-40 until tender. Note: spaghetti squash may need 15-20 minutes more baking time.

When spaghetti squash is cool enough to handle, cut in half, remove and discard as many seeds as possible. With a fork scrape the “spaghetti” strands out and place in a soup pot. If you like roasted garlic squeeze the garlic cloves into the soup pot. Transfer remaining vegetables to the pot and add cardamom, herbs, bay leaf, curry powder, and 5 cups water or broth. Bring to a boil, reduce heat, and simmer 20 minutes.

Discard the bay leaf and herb branches. Transfer to blender and puree soup until smooth. Season with salt, pepper and sriracha. Serve.

Serves 6

Note: Cardamom is the second most expensive spice behind only Saffron. If you can’t find it your local grocery store I’d recommend ordering from www.MySpiceSage.com

Permanent link to this article: http://dirtandmartinis.com/2011/05/23/curried-spaghetti-squash-soup-with-roasted-vegetables/

May 16

Drinking new life from those tired herbs


Hello everyone!  Today’s post is brought to you by  Andrew Odom – author, designer, community manager, homesteader, and (some would say) dreamer.

 Let’s face it. Herbs can become a bit stale sometimes. And no, I don’t mean tasteless or unpalatable from age but rather stale…as in old from familiarity. Most gardeners begin each spring (or continue in the case of all-season gardiniér) with the usual suspects of basil, chives, coriander, dill, fennel, mint, etc. In fact, I wrote about the herb essential here. But it takes a special person to find multiple callings for the flavorful foliages other than culinary, medicinal, or in some cases even spiritual usage. And by that I am talking about libational use of herbs (and some spices).

That’s right. When your whiskey has become a bit too sour or your Manhattan has begun tasting a bit more like the Jersey Shore, you can use those same dainty, delicate, redolent, botanicals for something a little more mature, if you will.

I encourage YOU to use the five recipes listed below to add a little garden spice to your already “nice” (reference to sugar and spice and puppy dog tails, etc….okay, it sounded better when I said it) to old recipe classics.

Cucumber Mint Gin & Tonic

SERVINGS

1 drink

INGREDIENTS:

2 slices cucumber

3 mint sprigs

3 ounces gin

4 ounces Q organic tonic water

1/2 ounce fresh lime juice

PREPARATION:

1. Muddle 1 slice cucumber and 2 sprigs mint in highball glass.

2. Fill with ice.

3. Add 3 ounces gin, 4 ounces tonic and 1/2 ounces lime juice.

4. Stir and garnish with a cucumber wheel.

Pepper Basil Caipirinha

SERVINGS

1 drink

INGREDIENTS:

1 bar spoon white peppercorns

1 bar spoon sugar

1 ounce lime juice

10 basil leaves

2 ounces cachaça

1 basil leaf

PREPARATION:

1. Muddle 1 bar spoon of white pepper corns and add sugar, 1 lime quartered and basil leaves.

2. Add cachaça and 1 ounce lime juice.

3. Shake the mixture and strain into a rocks glass over ice.

4. Garnish with sprig of basil.

La Vie En Rouge

SERVINGS

1 drink

INGREDIENTS:

1 1/2 oz. Grand Marnier

1 1/2 oz. fresh pressed cranberry juice (can substitute with bottled cranberry juice)

1/2 oz. fresh lemon juice

1/2 oz. simple syrup

Fresh rosemary needles

PREPARATION:

1. In a tall mixing glass, muddle 10-12 rosemary needles lightly with simple syrup.

2. Add remaining ingredients then add ice and shake vigorously.

3. Strain over fresh ice into a rocks glass with ice.

4. Garnish with a rosemary sprig.

Kiwi and Cilantro Mojito

SERVINGS

1 drink

INGREDIENTS:

3-4 sprigs of fresh cilantro

3-4 fresh spearmint leaves

2 slices fresh lime

1 kiwi, peeled and halved

1 tbsp. sugar (or simple syrup)

1 and ½ ounces light rum

Club soda

PREPARATION:

1. Lightly muddle the cilantro leaves, spearmint leaves, fruit, and sugar together in the bottom of the glass.

2. Add ice, rum, and enough club soda to fill glass.

3. Stir lightly to mix, and garnish with an extra slice of lime.

The Coriandrum

SERVINGS

1 drink

INGREDIENTS:

2 oz Square One Organic Vodka

1/4 oz Cinzano Bianco Vermouth

splash of coriander nectar (recipe below)

splash of orange bitters

coriander seeds for garnish

lemon twist for garnish

PREPARATION:

1. Pour the vodka, vermouth, nectar and bitters into a cocktail shaker filled with ice.

2. Shake for 30 seconds.

3. Strain into a chilled cocktail glass.

4. Garnish with a few coriander seeds and lemon twist.

————————————————————-

Bigger does not always mean better. Progress does not always mean forgetting our roots in order to forge a new future. Blogger, photojournalist, and hobby farmer Andrew Odom has spent much of the last few years rediscovering the lost art of living, growing, and being truly happy. Visit him online at www.tinyrevolution.us.

Permanent link to this article: http://dirtandmartinis.com/2011/05/16/drinking-new-life-from-those-tired-herbs/

May 11

My Little Helper

Need a stick momma?

Permanent link to this article: http://dirtandmartinis.com/2011/05/11/my-little-helper/

May 09

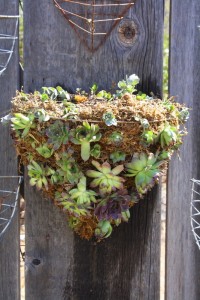
DIY-Succulent Hanging Wall Basket


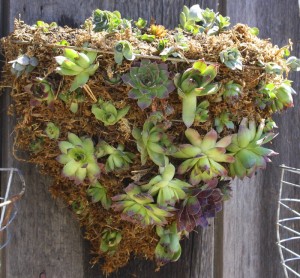
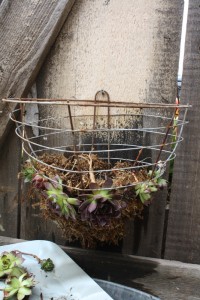
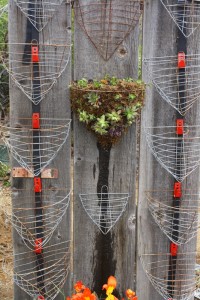
Vertical gardening, green walls and living wall art has certainly become the trend in garden design.  Companies like Wooly Pocket, Smith & Hawken, and Elt Living Wall Panels have come out with wall planting systems that allow you to create vertical gardens on indoor walls and the outside of buildings.  For those that have limited garden space or no planting beds at all you may want to consider vertical gardening.  A plain empty wall or fence can instantly be transformed into something beautiful with vertical “wall art”.  Are you new to vertical gardening?  I’m here to tell you that once you get familiar with it you’ll be hooked!  If you have access to free succulents and sedums, this project can be made for under $10. 

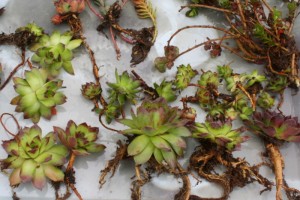
Oh mom, you may be missing a few hens and chicks from your garden :-)

Materials:

  • 16-inch wire basket

  • Sphagnum moss 432 cu. in. bag

  • Potting soil  suitable for hanging baskets

  •  Succulent and/or sedum cutting or plants

  • Water

  • Latex gloves

Directions:

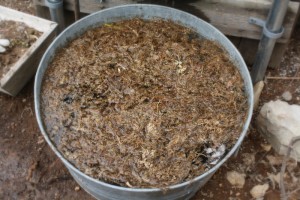
  • Put on gloves and add sphagnum moss to a bucket, fill with water and let soak for at least 10 minutes. While the moss is hydrating lay out your materials in an assembly line fashion: potting soil, plants, watering can or hose.

Soak for 10 minutes

"Foraged" succulents and sedum cuttings

  •  Hang  the wire basket so it will be easier to work with.  The basket will become heavy so make sure the nail or screw is firmly attached to a fence or wall.
  • To start your first row, grab a handful of moss and squeeze out the water.  Firmly press moss into the bottom, sides and back of the basket. The moss “nest” should be at least two inches thick with no holes or the potting soil may fall out.  Add potting soil to the moss “nest” and gently plant your first row of succulents. Now, sprinkle with water.

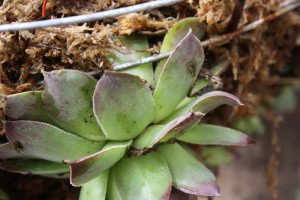
Gently lay the succulent roots over the moss and onto the soil

Tuck a leaf behind the wire to help hold succulent in place

  • Repeat the previous two steps until the top of the basket is completely surrounded in moss.  In the top of my basket I planted sedums that will get some height and flowers as they mature.  One of my favorites being Sedum Siebolbii.  Be sure to water well after planting. You’re done!

Water basket well after planted

One down, several more to go!

Do you like it?

If you have any questions please feel free to ask!  I’m not an expert but I’m more than happy to help in any way I can.  I’ve created this blog to share and learn from others so please feel free to post your garden pictures or questions on my facebook page or send them to me via Twitter…I’d love to hear from you!

Happy planting!

Permanent link to this article: http://dirtandmartinis.com/2011/05/09/diy-succulent-hanging-wall-basket/

May 02

Quick & Easy Broiled Salmon Chirashi


The May 2011 issue of Sunset magazine (page 120) features a “Fast & Fresh” recipe called Simple Salmon Chirashi.  After a day of working in the garden I was wanting a meal that not only quick and simple, but bursting with flavor.  Here is my variation of the recipe that I prepared with the ingredients I always keep on hand.  If you are a vegan/vegetarian this would be equally delicious with Asian style baked tofu.  

Chirashi sushi, meaning scattered sushi is a style of sushi where the topping is placed in a bowl over a bed of rice. Commonly, nine toppings are used, however you can certainly use how ever many are available to you. Follow the instructions as though you were making sashimi and simply place the pieces on top of the bed of rice. If you can, find a nice Japanese bowl, it will greatly enhance the presentation, but is not necessary. Depending on the size of the bowl, fill it approximately half full of rice, keeping it well aerated. Place the garnishes inside towards the edges and then the ingredients of your choice. Care is given to the presentation; placing the items just so, adding shiso, daikon, or whatever garnishes are chosen, and making the dish as attractive as possible. Think ‘work of art’ and you will get the idea. But don’t hesitate to use your imagination with the design, and to dig in when served. The first experience when served chirashi sushi is the presentation, the second is the eating.

Broiled Salmon Chirashi

serves 4

1 cup brown rice or white rice

1 lb. skinned wild salmon, cut into 4 pieces

1/2 tsp. each salt and pepper

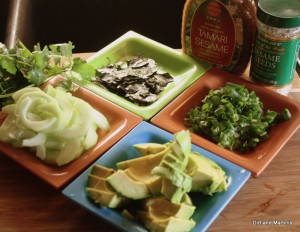
1 cup cucumber, halved and sliced

1 avocado cubed

1 sheet of nori, torn into pieces

2 green onions, sliced

2 tbsp. toasted sesamed seeds

4 tomatoes, cut into wedges (I used Campari tomatoes)

Cilantro for garnish (optional)

Asian dressing of your choice (I used Tamari Sesame)

Directions:

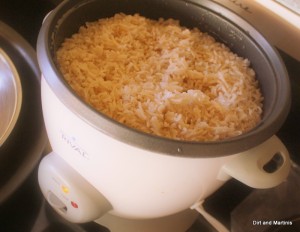
  1. Cook rice according to package directions.  I used my handy dandy rice cooker.

2.  Season salmon with salt and pepper on both sides and and in preheated broiler, broil salmon 3 minutes on each side.  For medium broil salmon for 2 minutes on each side.

3.  Divide rice among bowls equally among 4 bowls.  Top with cooked salmon and scatter with cucumber, avocado, nori, green onions, tomato, toasted sesame seeds and cilantro.  Serve with prepared Asian dressing.

This recipe, if made with white rice, can be made in less than 30 minutes!  If you decide to make it please send me a pic @dirtandmartinis on Twitter.  Or, post a photo on my Facebook page.

Happy healthy eating!

Related Posts Plugin for WordPress, Blogger...

Permanent link to this article: http://dirtandmartinis.com/2011/05/02/quick-easy-broiled-salmon-chirashi/

Older posts «

» Newer posts